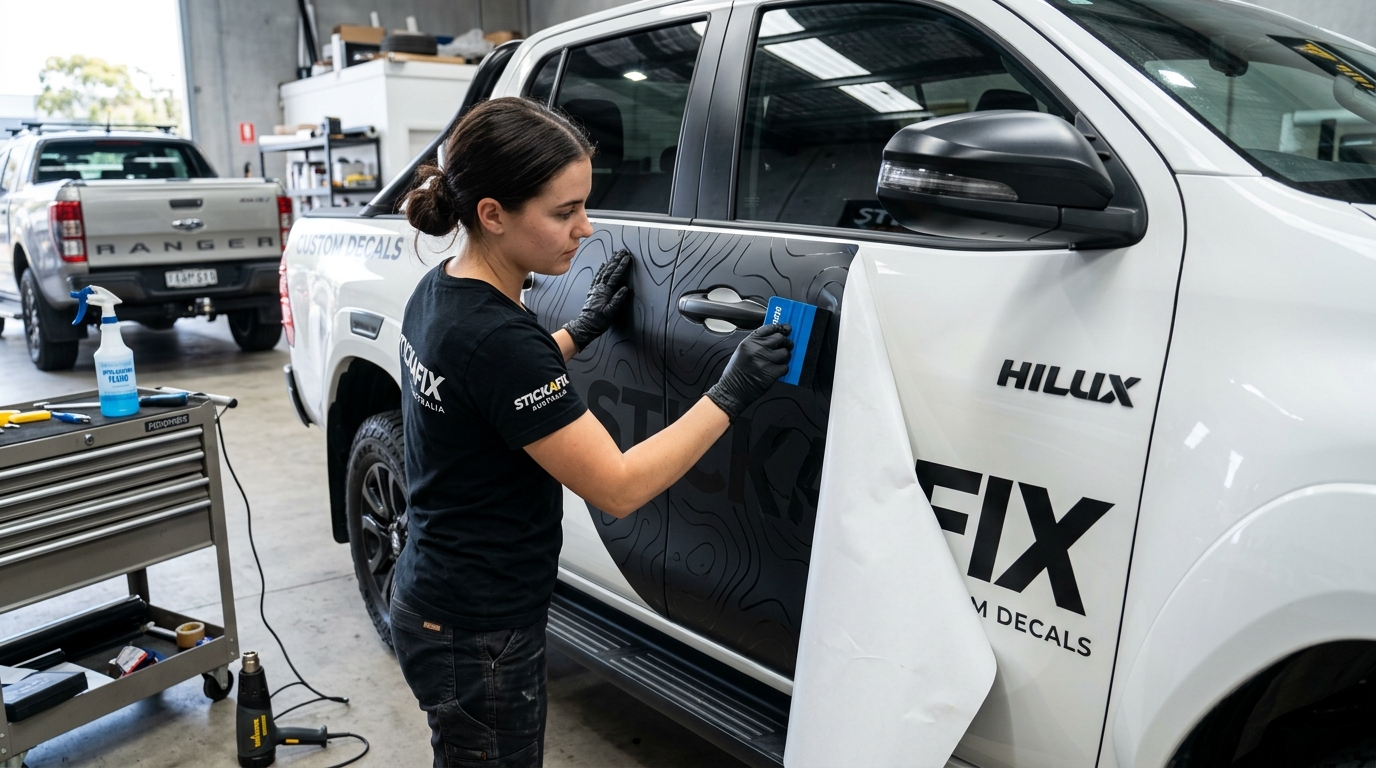
Updating your vehicle with custom lettering, business branding, or 4x4 decals is a brilliant way to make a statement on the road. However, swapping out old stickers for fresh ones can feel intimidating if you have never done it before. Whether you are stripping cracked stickers off a work van or learning how to install vinyl graphics on a car for the first time, having the right technique is essential.
The harsh Australian sun can bake adhesive right into your paintwork, and a rushed installation can leave you with crooked, bubbly stickers. We are here to help you get it right. From the initial car vinyl graphics removal to the final squeegee swipe, this complete guide will walk you through everything you need to know to achieve a professional result.
How to Remove Vinyl Graphics from Your Car
When learning how to remove car decals, patience is your best friend. Years of exposure to UV rays, salt air, and road grime can make older vinyl brittle. If you try to pull it off cold, it will snap into tiny, frustrating pieces.
The secret to how to remove vinyl graphics from a car safely is heat. You will need a standard hairdryer or a heat gun on a low setting, a plastic scraper, and a quality adhesive remover.
Step 1: Apply Heat to the Decal
Start by warming up one edge of the vinyl with your heat gun. Keep the heat source moving constantly about 15 centimetres away from the surface. You want the vinyl to be warm to the touch, not blistering hot, as excessive heat can damage your clear coat.
Step 2: Peel Slowly
Once the vinyl is soft, use your fingernail or a plastic scraper to gently lift a corner. Pull the vinyl back on a 45-degree angle. Pulling straight up can separate the vinyl from its adhesive, leaving all the sticky residue on your car. If the sticker begins to resist or tear, simply apply a little more heat and continue.
Step 3: Clean the Residue
After the vinyl is off, you will likely have some leftover glue on the panels. Spray a citrus-based adhesive remover or use eucalyptus oil on the sticky areas. Let it sit for a minute to soften the glue, then wipe it away with a clean microfibre cloth. For a deeper look at tackling stubborn glue, check out our comprehensive guide on removing old vinyl decals.
Prepping the Surface for New Graphics
Proper surface preparation is the foundation of any successful vinyl decal installation. Any wax, grease, ceramic coating, or leftover adhesive will stop your new ORAFOL vinyl from gripping properly, leading to peeling edges down the track.
First, wash the area thoroughly with soapy water to remove general dirt and road grime. Dry the panel completely with a microfibre towel. Next, wipe the entire application area down with isopropyl alcohol and a lint-free cloth. This strips away any lingering oils and leaves a perfectly clean surface for the adhesive to bond with.
A very common question we get is about applying vinyl to a freshly painted car. If you have just had your vehicle repaired or resprayed, you must wait at least three to four weeks before applying any stickers. Fresh automotive paint needs time to outgas as the solvents evaporate. If you install vinyl too soon, those escaping gases will become trapped under the sticker, causing massive bubbles and potentially lifting the fresh paint when the sticker is eventually removed.
Wet vs Dry Vinyl Application: Which is Better?
Understanding wet vs dry vinyl application is crucial for getting a flawless finish. The method you choose depends heavily on the size of the decal and your confidence level.
The dry method is exactly what it sounds like. You apply the sticky side of the vinyl directly to the dry panel. This method provides immediate, strong adhesion and is perfect for smaller custom text, social media handles, and standard window decals. However, once the vinyl touches the glass or paint, it is stuck fast. There is no room for adjustment.
The wet method involves misting the car panel and the adhesive side of the decal with a mixture of water and a single drop of baby shampoo. This temporary moisture barrier allows you to slide the sticker around until it is perfectly level. Once positioned, you squeegee the water out from underneath, and the adhesive takes hold. The wet method is highly recommended if you are figuring out how to apply large vinyl graphics. You can read more about deciding which method to use in our vinyl application guide.
How to Apply a Vinyl Decal to a Car Window or Panel
For standard sized stickers, the dry top-hinge method is the most reliable way to get a perfectly straight result.
Step 1: Position and Tape
Hold your decal against the window or panel and secure it in place using a strip of masking tape along the top edge. This creates a hinge. Step back and check that the decal is perfectly level. If you are struggling to find the right alignment, our measuring guide offers great tips on finding the centre point of your vehicle panels.
Step 2: Remove the Backing
Flip the decal up on its masking tape hinge. Carefully peel the paper backing away from the adhesive. Let the backing paper drop away, but hold the bottom corners of the application tape taut so the sticky vinyl does not accidentally touch the car yet.
Step 3: Squeegee the Vinyl
Using a felt-edged squeegee or a credit card wrapped in a soft cloth, start at the top centre of the decal right below your tape hinge. Press firmly and sweep the squeegee outwards to the left, then outwards to the right. Work your way down the sticker in overlapping strokes. This forces the air out to the edges and prevents bubbles.
Step 4: Peel the Application Tape
Wait a few minutes to let the adhesive bond. Then, pick at a corner of the clear or paper application tape and slowly peel it back on a sharp angle close to the surface. Do not pull straight out towards yourself. If any part of the vinyl lifts with the tape, simply roll it back down, apply more pressure with your squeegee, and try again.
How to Apply Large Vinyl Graphics
Tackling large side stripes or bonnet graphics requires a slightly different approach. For oversized decals, the centre-hinge method is far safer and much easier to manage alone.
Position your large graphic on the car and run a vertical strip of masking tape right down the middle of the decal, splitting it into a left and right half. Peel one side of the decal back and cut away the backing paper underneath it with a pair of scissors. Carefully lay that exposed half down onto the panel, squeegeeing from the centre tape line outwards to the edge.
Once the first half is secured, remove your centre masking tape. Lift the remaining half of the decal, peel off the rest of the backing paper, and squeegee it down from the centre outwards. This technique ensures massive decals go down smoothly without wrinkling or sticking to themselves.
Frequently Asked Questions
How long do car vinyl graphics last?
We use premium German-engineered ORAFOL outdoor vinyl, which is designed to withstand the harsh Australian climate. With proper care, these decals typically last between 5 and 10 years before showing signs of fading or cracking.
Can I wash my car straight away?
No, you should wait at least 48 to 72 hours before washing your vehicle. The adhesive needs time to fully cure and bond with the clear coat. After this curing period, regular washing is fine. Check out our vinyl decal maintenance tips to keep your graphics looking vibrant for years to come.
Will removing decals damage my paint?
If your vehicle has original factory paint, safely removing vinyl with heat will not cause any damage. However, if your car has had a low-quality aftermarket respray or the clear coat is already peeling, the adhesive may lift flakes of paint during removal.
Ready for a Fresh Look?
Whether you are pulling off old faded lettering or adding a bold new look to your 4x4, taking the time to properly prep, position, and squeegee your decals makes all the difference. Master the techniques above, and your vehicle will look like it just rolled out of a professional sign shop.
If you are ready to upgrade your ride with premium, weather-resistant outdoor vinyl, jump into our sticker designer to create your own custom social handles and text graphics today.